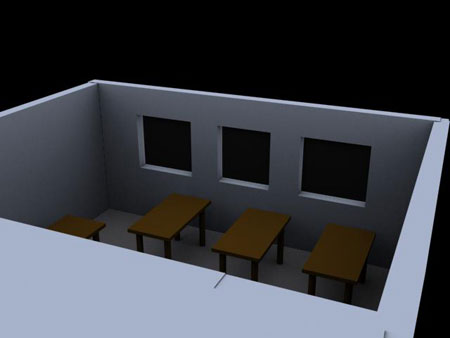
Cours pilotes - Firefly
Creation of a 3D room :
We used Autodesk 3ds Max 8.
TO CREATE A neW document.
When the program starts, you see this:
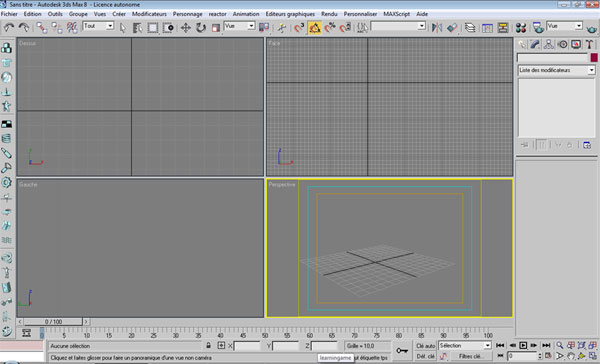
Toolbar
![]()
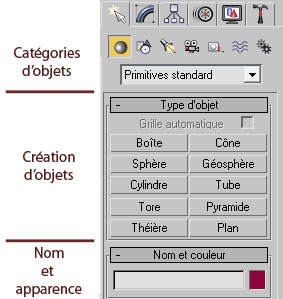
Creation menu
Time and navigation tools

To save your document:
- "File"
- "Save as"
- Enter the file name
- Choose the file place
- Click on"Save"
We start creating the floor of the room
- In the tab " Create ", select " Geometry "
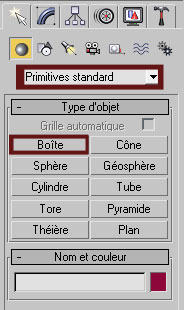
- In the pull-down menu, select "Standard primitives"
- Click on " Box"
- In this view, create a box with the chosen surface, click where you want to have the lower right corner and while pressing the mouse, drag the mouse where you want to have the upper left corner.
- You see this :
For the walls, use the same way (To move an object in the scene use: ![]()
The cross to move on X Y Z and the arrow to the rotate on X Y Z. After to move, you can change the object size ,change in the "Change": ![]() )
)
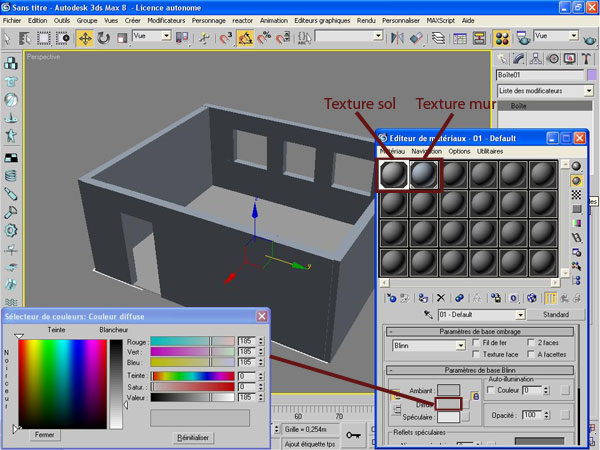
TO APPLY A pattern
- Select a box
- Open the patterns box by clicking on :

- Click on the first button. (Each button is a different pattern)
- Click on the color area in "Diffuse"
- A dialog box "colors selector " appears
- Choose the color and click on "Close"
- To apply the texture to the box, click on :

- Do the same for each box.
To Create furniture
We start with a table
- For the top plank, use the tool "Box"
- For the legs, use the tool "Cylinder" (To do easier, you can cutt objects off, by selecting and right click "Isolate selection" to return to normal mode, click "Exit mode isolation" in the window at the left bottom).
- To create the cylinders, it's the same, but for that you must start by creating the base.
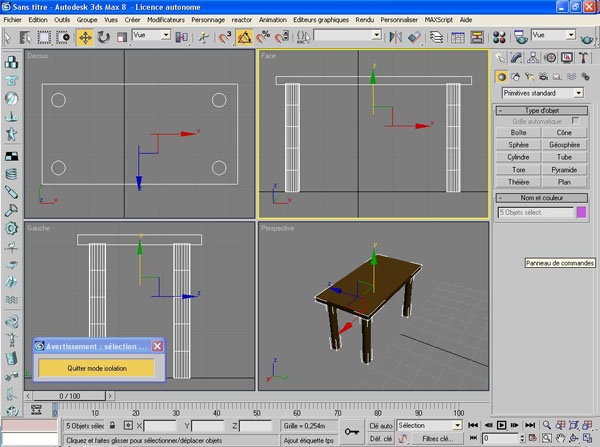
- Exit the isolation mode and put the tables in the room using the moving tools.
- Now, we gather the different pieces of the table. Select all objects by pressing CTRL. In the tab "Group" click on "Group" in the dialog box write the group name.
- To create a lot of tables , we have to duplicate one.
- Select the table, click on the moving tool and while pressing on the SHIFT, move your table. After a dialog box "Option cloning" appears. Check "Copy" and choose the number of copies. Close by clicking on "OK".
- Place the tables where you want.
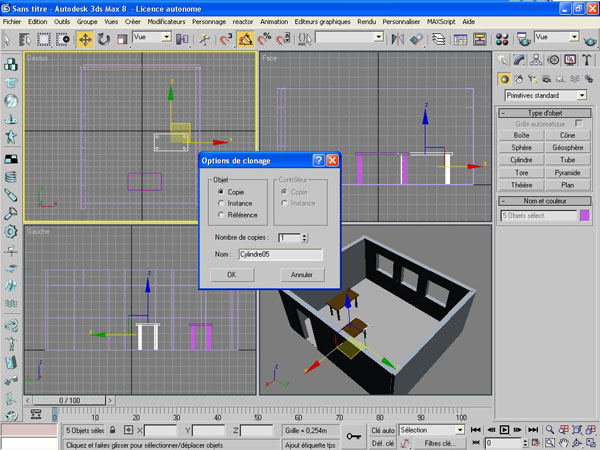
Use the same technologies for what you want to create.
- The windows : create a thin large box and place it in holes of the windows. (green in the picture)
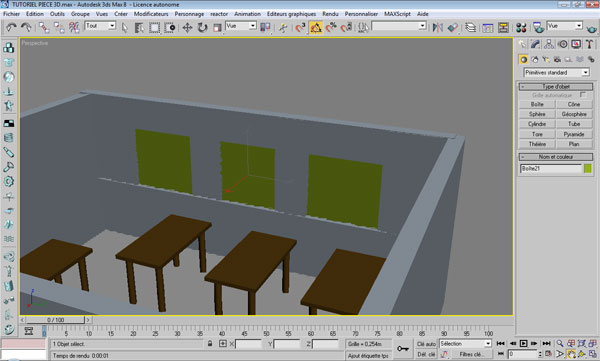
- Open "Textures" and select an empty area.
- Click on "Standard". A dialog box - "Explorer materials" - opens. In "Library materials" double-click on the SoapBubble pattern.
- Click on "Basic Materials"
- Set the "opacity" on 10, "specular level " on 25 and "Lamp" on 0.
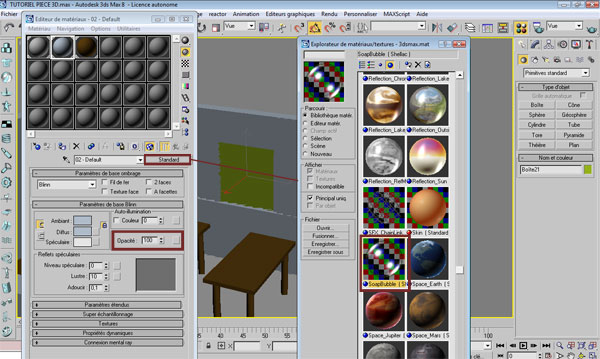
- You see this:
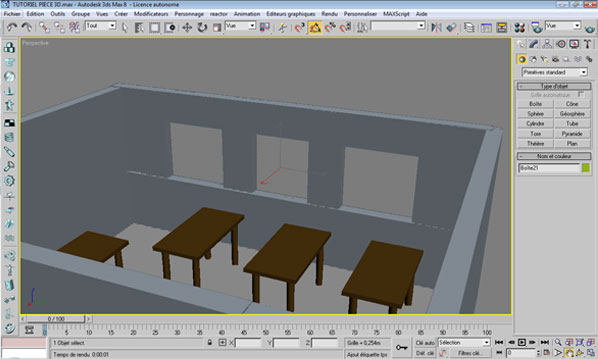
To Create a final picture.
The final picture you have, after the scene calculation.
- First, create a light in the scene by choosing "Enlightenment" in the creation menu.
- Choose "dome light" and click anywhere in the scene to create it. In the right column, select "Project Shadow"
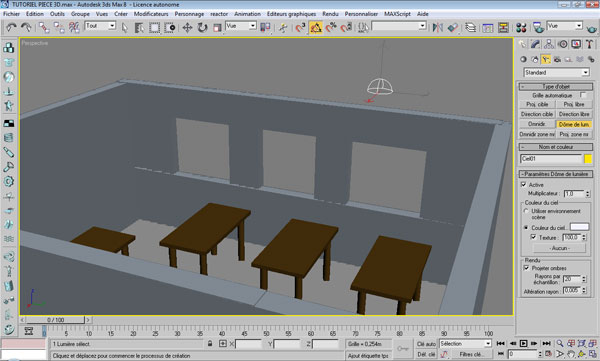
- Click now on:

- A dialog box appears. In "Size exit", choose the size.
- Then, click on "Rendu"(= the final picture).
- Step by step, a dialog box with your picture appears.
