
Tutoriaux - Abrasoft PhantaMorph
1. Introduction morphing
Image morphing techniques have been widely used in creating special effects for television commercials, music videos such as Michael Jackson's Black or White, and movies such as Willow and Indiana Jones and the Last Crusade.
It’s an image processing technique used to compute a transformation, that is, a metamorphosis, from one image to another. The idea is to create a sequence of intermediate images, which when put together with the original images, represents the transition from one image to the other.
The morphed pictures in sequence can be shown as a dynamic process like a movie. The result can be very interesting.
In a morphing sequence between two faces, the middle image often looks strikingly lifelike, as a real person, but clearly it is neither the person in the first or in the second image.
Morphing between two images achieves the best results if the images are roughly of the same shape and colors, e.g. morphing from a tree to a cat may not result in such a good transition as when morphing from one face to another. In this case the middle image might look strange since it got no equivalence in the real world.
With Fantamorph, you can create morph between 2 images; or create a warp (to make one image move); or create a morph between more than 2 images. In this tutorial, we will see how to make a morph between 2 images.
2. Starting a project
Launch Fantamorph.
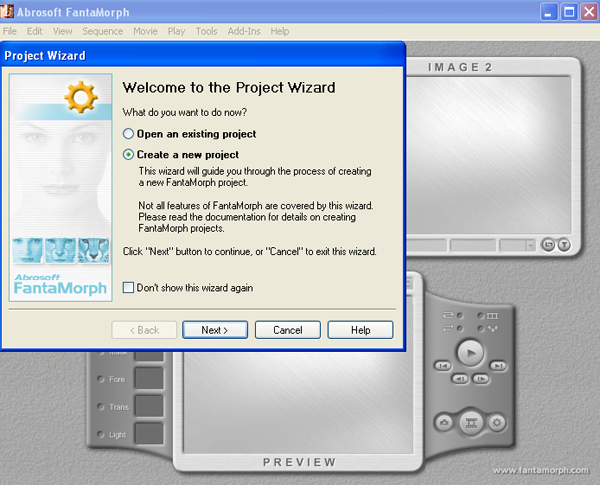
a) An easy way for beginners to do morph is to use ‘the New Project Wizard’.
- On the welcome window, you can choose one task from "Open an existing project " or "Create a new project". (If you don't want to use the wizard at startup of the program, just check the "Don't show this wizard again". You can still launch the wizard by choosing the File/New Project Wizard menu at any time.) To go to the next step, just click the ‘next’ button.
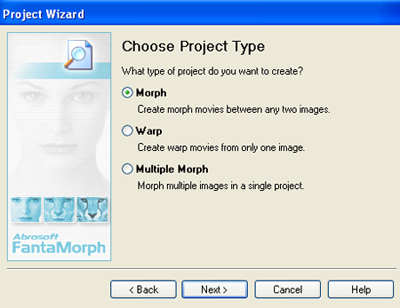
- Choose project type you want to create. We choose to create a morph.
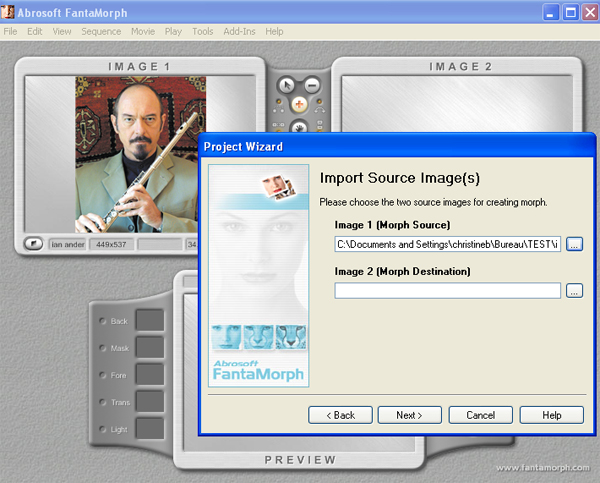
- We begin by selecting two images to morph, a beginning image and a final image.
- Now you can crop or adjust source images if needed. (Just press "Next" button to bypass this step.)
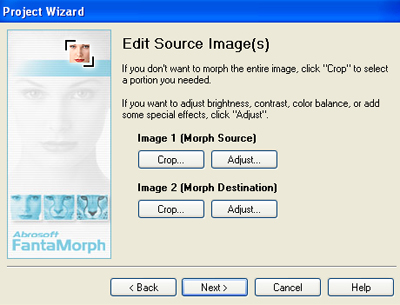
For a best rendering, we often have to crop one image to adjusted it to the oder, a.s.o... We can make it with the program:
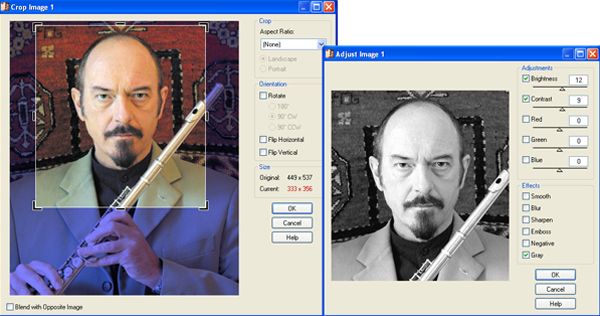
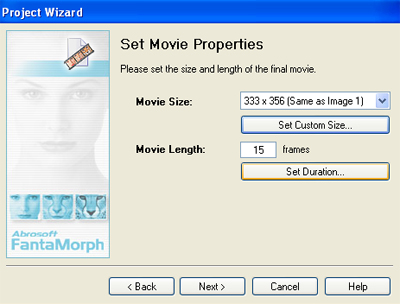
Do the same with image 2. - Now you need to set the movie size and length. You can choose any fixed value offered in the Movie Size list, or you may set it to any desired value by choosing the button " Set Custom Size". The default frame count value is 15, if you want a smoother, more detailed morph result, simply add more frames. If you want to set the movie length by duration, just click the "Set Duration" button.
- You can add some stunning effects for your morph:
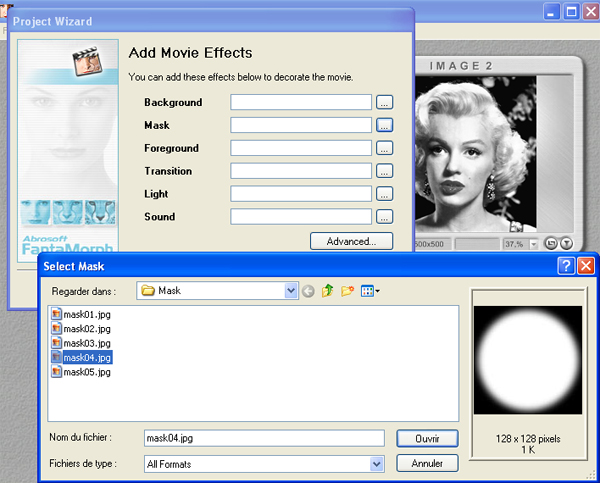
You can choose somme existing feature (the program proposes some background, foreground,...), or you can create some effect yourself, by using Photoshop for example. A mask make a part of the image transparent, so you can apply a background, and it will appear. (the mask will be applied on the image and if you apply a background, the back zone of the mask will become transparent and will let appear the background). - Now, click the "Finish" button to exit the wizard. The morph movie has been now created.
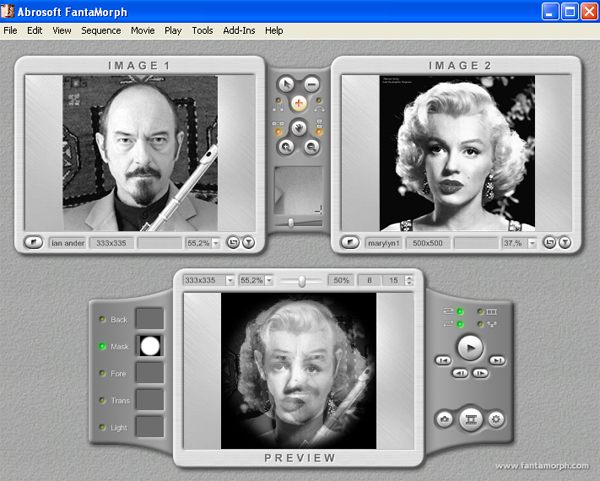
You see in the first frame the image source, in the second frame the image destination, and in the third frame the morph movie.
Because you have not added any key dots, the morph is simply a cross-dissolve between the two source images.
You now have to start the most important work that is to place key dots on both source images in order to define how the morph process will operate.
b) If you don't want tu use the wizard, do it manually.
Import the source images by choosing File\Import Image 1... menu, then File\Import Image 2...,
or by clicking the Import Image buttons (1 and 2)
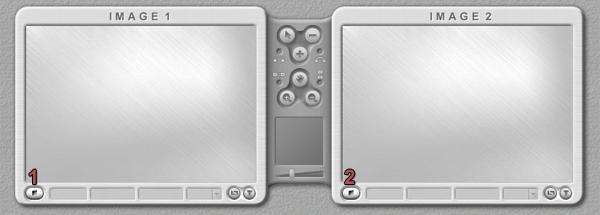
Any feature you have chosen with the wizard, you can load them manually. Let's see the tools:
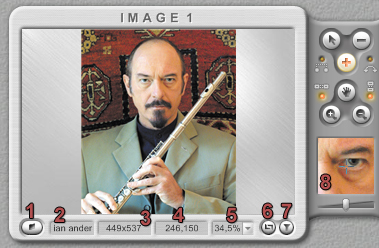 |
|
| You can also choose a background, a mask... as in the project wizard. Once you have choosen, you can display or not by clicking once, if you click twice you can change load another feature... A right-click on the feature you have loaded and it disappear. |

|
c) Notice...
For an optimal result, you'd better optimize the images first in Photoshop.
You should remove the background and save the file in .png to keep the transparence. Then prepare an other background and import it in PhantaMorph so that the software can calculate the transition only for the subject.
Remember that the most important element in producing morphs, whatever the software you’re using, is to place key dots on both source images in order to define how the morph process will operate. So let's place dots.
3. Adding dots.
The principle is to place key dots on both source images in order to define how the morph process will operate.
Let's see the tools:
 |
|
Let's begin whith our photos.
- This time we will work with photoshop retouched photos: cut out faces with transparent background; the background will be loaded as an external file:
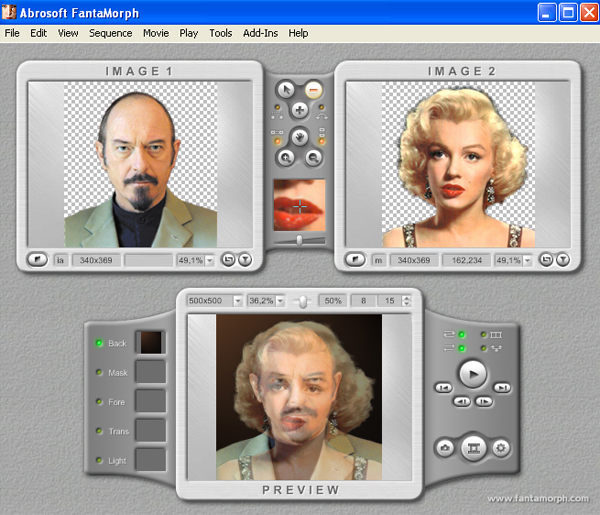
- As we have said, it's good to place dots on the major elements of a morphing image; in this example, the major elements are eyes, nose, mouth,... (NB: In FantaMorph Deluxe, a "Face Locator" button will appear on this page. It helps you to automatically place key dots on images of human face.)
Let's put keys on those elements. - Confirm that the edit tool Add Dot + is selected, then move mouse to the corner of the eye.
- Click the left mouse button. A dot will appear on image 1, and a corresponding dot will appear on image 2. Move the corresponding dot to a suitable position. The zoom 7 will help you. If you don't see where the corresponding dot is on the other image, juste rollover the dot and it will appear in white on the other image.
- Add other dots for the remaining corners of both eyes. The more dots you place on the elements of your image, the better your morph result will be, so feel free to continue adding dots to further define the eye shapes.
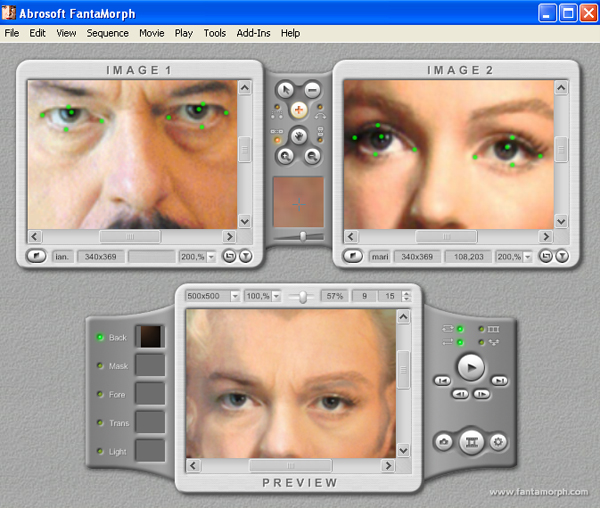
Notice that the movie morph will change accordingly as each key dot is created or moved! - You can help you with the preview tools. Notice that with this software, you don't have to make an render to visualize your final morph, you will immediately see it...
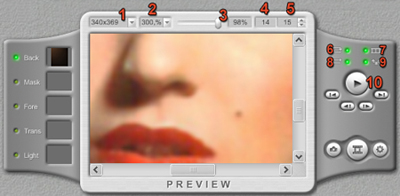
- You can choose the Movie Size. The default value is the same size as Image 1. You can choose any fixed value offered in the popup menu, but as I said it's better to work with images which have already the same size...
- You can adjust the percentage of visualisation of the morph. (you can zoom in, zoom out, adjust...)
- The most important control is the Preview Slider Bar. Each morph frame from the first to the last can be previewed easily by simply dragging the Preview Slider.
For example, if you position the slider at the center, you will preview the frame representing the middle of the morph. If you position the slider all the way to the right, you will preview the final frame of the morph, which is essentially Image 2. - The Current Frame box
- The Movie Frames box. If you want a smoother, more detailed morph result, simply add more frames: click, input a new frame count and press the Enter key; or click the Movie Frames Spin Button to increase or decrease the frame count by one.
- Auto loop: the morph will repeatedly play until you press the Pause.
- Auto play all (used with sequences).
- Auto Reverse: make the morph cycle from start to end, then reverse from end to start.
- Auto Switch (used with sequences)
- This is the control panel: Play/Pause button, previous frame, next frame, jump to the first and to the last frame buttons.
- Do the same with the eyebrows, the mouse, the nose etc. And you will see the movie morph little by little become nicer.
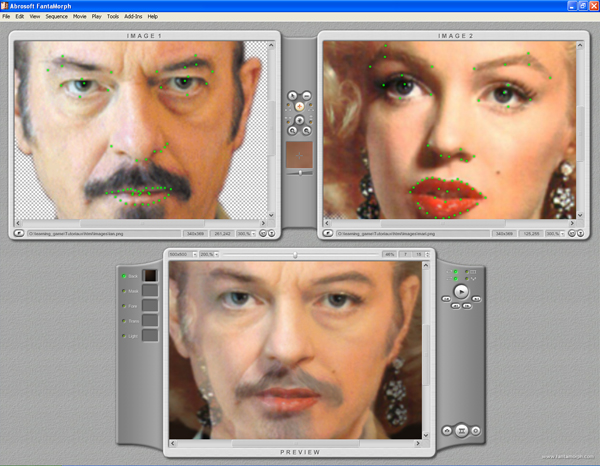
- Then the contour of the face, the shoulders, the hairs...
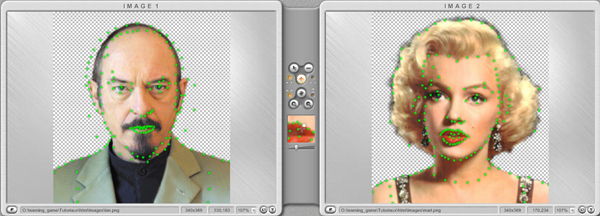
- Let's see the result:
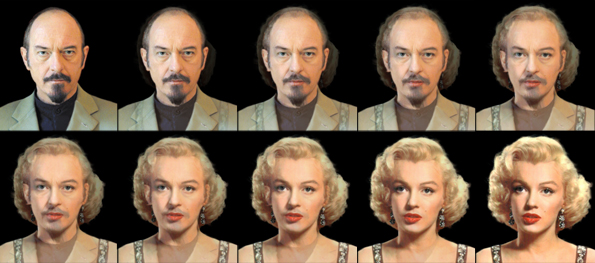
- Now you have to export your movie.
4. Export the movie
You can export only some frame, or the whole morphing.
Choose File\Export Current Frame... or File\Export movie... menu, or use the toolbar beside the preview box:
 |
|
To export a frame, drag the preview slider to the position indicating the image you want to export, and choose a name and an image format.
To export the movie:
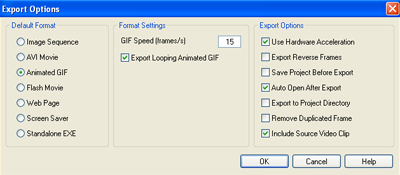
First choose one of the 7 export methods availables: Image Sequence, AVI Movie, Animated GIF, Flash Movie, Web Page, Screen Saver and Standalone EXE. Then, adjust the export parameters by clicking the Export Options button.
In the Movie Export Window, click on the format you've choosen, and click the "Export" button to start export...
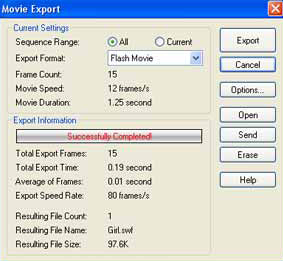
... And "Open" to see your movie...

