
Tutoriaux - Adobe Audition
Working In Multitrack View
Loading audio clips:
- The audio files currently opened in Edit View already appear as clips in the Files list.
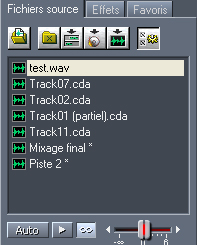
Load the audio tracks you wish to use into this File List by clicking the Import File icon

or use the Insert > Audio command. Do this for each file you wish to load into your multitrack session.
Notice that if you use the Insert > Audio command, the audio will automatically appear on the timeline, in the track selected. - Drag and drop each loaded audio clip on the timeline.
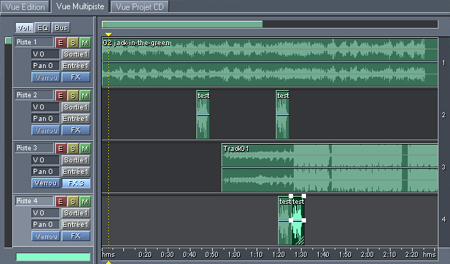
Remark that you can use the same clip as much as you want in the timeline! - At this point you will need to adjust each clip (by draging them left or right) to get them syncronized.
Working with clips:
- To move a clip or change its properties, you must select it. You can select either individual clips or all clips in a track or session. Here are the selection tools:
- The Hybrid tool

- Time Selection
 tool
tool - The Move/Copy Clip

- To select an individual clip:
Click the clip in the track display. - To select all clips in a track:
Select the track.
Choose Edit > Select All Clips In Track... - To select all clips in a session:
Choose Edit > Select All Clips or the Control+A shortcut. - Once a clip is selected, you can crop it: position the cursor over the left or right edge of the clip:
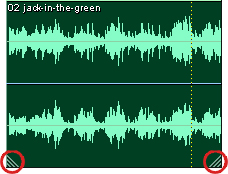
The edge-dragging icon appears. Drag to edit clip edges.
 - You can cut a clip: select the clip you want to cut, position the time mark (the yellow line) in the right place, use the cut icon :

- In the Audio Clip Properties window, you can change settings such as volume, pan, and color for audio clips. Clip settings for volume, pan, and mute are independent from similar track controls.
To change the properties of an audio clip:
Right-click the clip, and choose Audio Clip Properties... - To test the multitrack audio clip, click on the Play button. You may also double-click on any track or clip to edit them individually in Waveform View, then go back to Multitrack View to continue your multitrack session.
Remember: switch with those buttons :
To crossfade two clips:
You can crossfade audio clips to transition smoothly from the end of one clip to the beginning of another. Crossfades consist of a fade out and a fade in over a transition region.
- Place the clips on separate tracks. Position the clips so the end point of the first overlaps the start point of the second.
- Across the overlapping area, select a transition region for the crossfade. The transition region must start before the end of the first clip and extend beyond the beginning of the second clip.
- Select both clips (Ctrl+click)
- Choose Edit > Crossfade, (or right-clicking) and then choose one possibility. Linear produce an even crossfade, but you can also test the different ones.
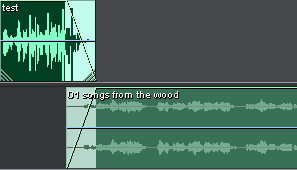
Audition create a fade out at the end of the clip, and a fade in in the beginning of the other clip. If you didn't select both clips and Audition make a fade only on one, just select the other, and do the same.
As the difference of the edit mode, those fades aren't destructive. You can easily remove them.
Using Loops:
The use of loops is many current. You can create yours, or use the ones offered by Audition.
Here is the principle of loops: first select a waveform or a part of it, than specify its properties in Edit View, and finally use the resulting loop in compositions in Multitrack View.
There are lots of possibilities in Audition to change the pitch and the timing of loops... Use the help of Audition to better learn how to define loops. But basically:
- First define the part of the waveform to loop
- Drag the clip in the timeline in the multitrack view
- Define it as a loop by right-clicking on it, and choosing Loop Properties (or Edit > Loop Properties) and Enable Looping in the Audio Clip Looping dialog box. A symbol will appear on the waveform.
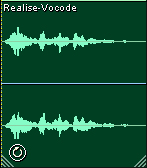
- Add repetitions of the loop:
- Select the clip and position the pointer over the bottom left or right edge. The loop editing icon appears
 .
. - Drag with the mouse the handle to extend the loo. Depending on how far you drag, you can make the loop repeat fully or partially. Afterwards you can modify the loop: lengthen or shorten it.

How to save/export your multi-track session
Audition saves information about mix settings and source files in session files (.ses). Session files are relatively small because they contain only pathnames to source files and references to mix parameters (such as volume, pan, and effect settings). To more easily manage session files, save them in a unique folder with the source files they reference. If you later need to move the session to another computer, you can simply move the unique session folder.
Be sure to save both the session and the final exported audio. If you export the audio only, you will not be able to go back and edit your multitrack session.
- When your multitrack session is complete, first go to the menu bar and select File > Save Session
- Choose a location to save your session file and click Save
- When your multitrack session has been saved go to the menu bar and select File > Export > Audio
- Choose a location to export your multitrack session
- Choose a file type to export your session as...
- Advanced options can be set at this point for certain file types by click the Options button.
- Click the Save button to export your multitrack session audio

