
Tutoriaux - Swish
Practise 1
Draw with swish
- Open a New Movie by clicking on File > New (Ctrl+N) or by chosing 'Start a new empty movie' on the prompt window.

- Go to the Movie pannel and adjust the properties of the Stage: the width, the height, you can also put a background color...
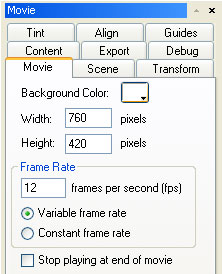
Note : the Frame Rate is the number of frames read on 1 second. By default it's set to 12. The highest will be this number, the most flowing will be your animation, but also the heaviest! - With the tools, draw a character on the Stage.
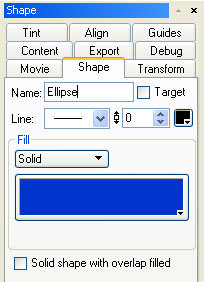
- For each shape you draw, the properties menu gives you information and characteristics. There, you can rename it, define the style, the colours etc
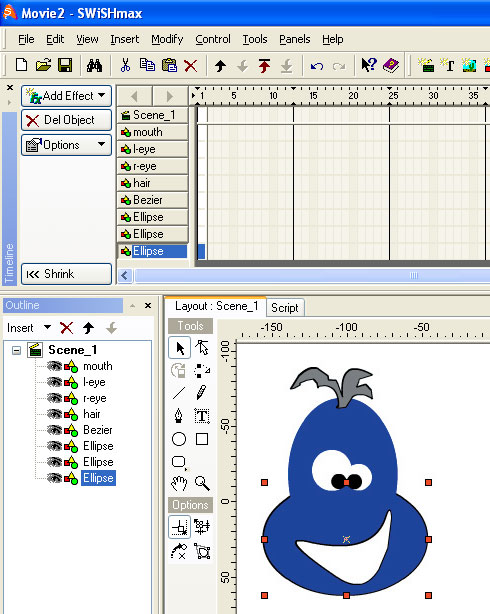
- You can see that each New Object is automatically created on a new layer. You can change the order if its necessary, by dragging the layer you want to move.
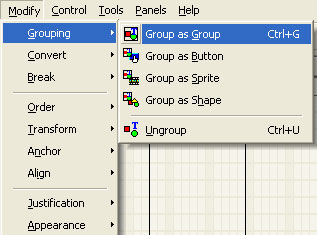
- When your Object is done, you have to group it. Your object will get only one shape and thus, it will get only one layer.
- To do that, select all the parts of your character and click on Modify > Grouping > Group as Group.
Motion effect
Select your Object with the Motion Path tool and move it to the place you want. Youll see that the way that the Object will follow appears in form of a dashed blue line. If you want your Object to follow a more complex way, you just have to repeat this step as much as you want.
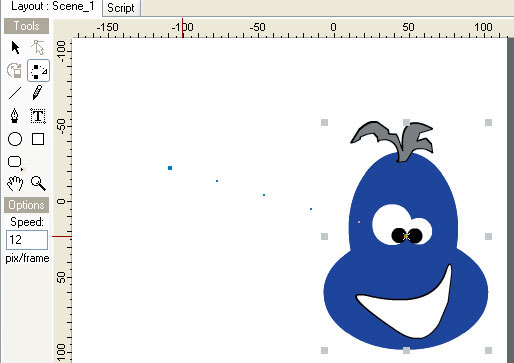
Play your animation by clicking on Play Timeline.

As you see, the animation loops.
If you want your animation to be played only once, you have to add an action to a frame.
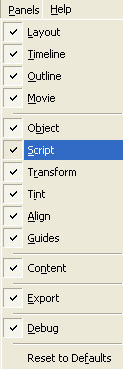
Add an action to a frame
Note: The Script panel is by default in the middle, beside the Layout panel. If not, you can display it -and also any else panel- by activating it on the panel menu. You can also drag it to the right, with the others panels.
In the Timeline, select the last frame of the 'Scene_1' layer.

On the Script Pannel, click on the Add Script button and select Movie Control > stop()
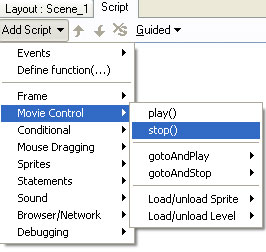
A red square has appear in the Scene_1 layer.
![]()
You can now play your animation, it will stop at the end.
Make an object transparent
- You can give to this object the color characteristics that you want.
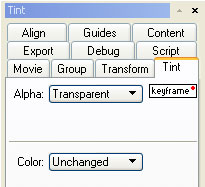
- Here we want to change the Alpha: your object will have an Alpha of 0% at the end of your animation.
- Select the last frame of the layer that contains your object.
- In the Tint panel, change the Alpha to Transparent and read your animation.
Display an object before applying an effect
- In the timeline, select the Move effect, and drag this to the right. Make the same thing for the 'stop()' action on your 'Scene_1' layer.

- If you read your animation, youll see that the effect has moved, but your object doesnt appear anymore on the first frames.
- To make it appear, click on the first frame of your layer, than click on Add Effect > Place.

- A little green point will appear on your frame.

- Read your animation: your object now appears before the effect is being played.

