
Tutoriaux - Swish
Practise 4
SPRITE in a button
A Sprite is an animation clip inside the animation.
His big advantage is having it's own timeline, independently of the main animation.
- Write a text on the Scene_2
- Convert it to Button
- Create the different states of the Button (up, over, down)
- On the Outiline panel, select the content of the Over state
- Convert it to SPRITE (Modify > Convert > Convert to Sprite).
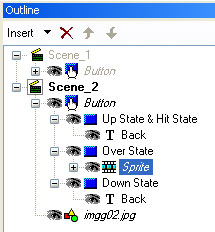
- Click on Sprite on the Over State. You have now a new Scene (here called Sprite) with its own timeline.

- Select your text and ad an effect. Don't forget to put a stop() at the end of the sprite's timeline.

Using of Sprite
- Go back to Scene_1
- Insert a Text
- Convert it to Sprite
- In the Outline panel, select the text of this sprite.
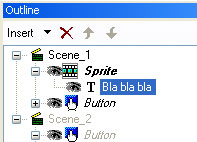
- Apply an effect to the Text
- On the last Frame of the Sprite's timeline, ad a Script: gotoAndPlay(1).
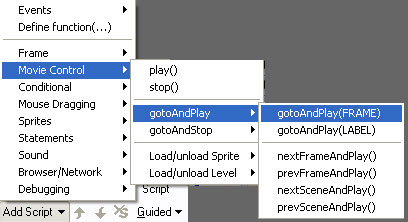
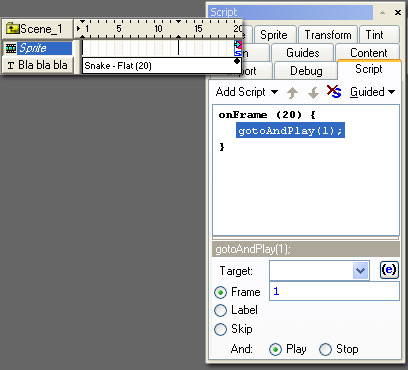
- Test your animation.
Thanks to this action, the animation inside the sprite will loop. Because this animation has an independant timeline, the sprite will go on to loop, in spite of the stop() on the main timeline!
Export your animation
If you save your movie, you will have a .SWI file: this is the working file of Swich. But to be displayed in a Web page, your animation has to be exported.
- The export format is .SWF: it's the Flash export format, which will be played by the Flash Player.
File > Export > SWF...

- To be displayed in a Web page, the animation must be integrated in a .HTML file.You can also create this .HTML file in Swich by chosing File > Export > HTML+SWF...
- Note: you also have an Export panel, which allows you to modify your Export options...
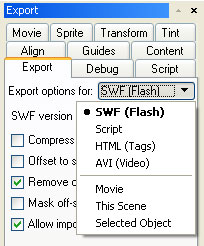
- Don't forget to send both .HTML and .SWF files when you'll publish your animation!

