Tutoriaux - Adobe Premiere
Starting a Project
Introduction
Adobe Premiere is a powerful video editing software. This tutorial will show you how to begin with this software.
The first step to editing video in Premiere is to create a project file. A Project file is a Premiere file that stores references to all of your media clips and information about how you arranged and edited the clips. Everything used in your project will be accessible and organized in the Project Window.
To create a new Project:
- The New Project dialog box appears when you launch Premiere.
- If not, choose File > New > Project.

- Choose a preset and a directory.
- If you're not sure of the preset, choose DV-PAL, this is the format for european camcorders.
It's better to create a new directory just for your project in whitch you will copy or record all the media you will use, so that the component files don't get lost or deleted. - Enter a Name for the project.
- Click OK to begin working on your project.
Capturing video:
Capturing video is the procedure you will use to get media clips from your camera into the computer to edit.
To connect a DV camcorder to the computer:
- Connect the 4 pin end of the Firewire cable to the DV camera. (On the ETC's Canon camcorder this is marked DV IN/OUT.)
- Connect the 6 pin end of the Firewire cable to the computer's Firewire port.
Capturing and saving video:
- Choose File > Capture (or the F5 shortcut).
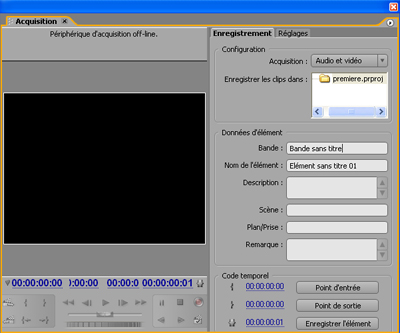
- The capture dialog box appears.

- The window allows to capture Audio and Video, or just Audio or just Video.
- This window takes over control of your digital camera. You can play back, rewind, use shuttle to move back/forward, move by single frame...
- Capture with the red button and stop with Escape.
- Once you stopped recording, you will be prompted to save the file.
- After that your clip is in the bin.
Importing Media Files into your Project:
Premiere suports a wide variety of media formats, including many types of audio and video, as well as still images and animations. To import media files:
- Select File > Import... (or the Control+I shortcut).
- Select a file, and click Open.
- The file will be added to your Project window.
- You can organize the imported media by dragging it into a specific bin in the Project Window.
- Importing the folder will create a new bin with the same name.
The files appear in the Project window. For each file that you import, the Project window lists its name, type, and duration. Other columns let you add your own descriptions or labels. You can scroll or enlarge the window if necessary.

