Tutoriaux - Adobe Premiere
Editing Video
The Rough Cut:
To get started on your project, you may want to create a rough cut of your video program. A rough cut is simply a sequence of clips assembled in the general sequence you want, with little or no editing.
A rough cut can quickly give you some sense of your video program’s effectiveness, letting you start making decisions about where to cut, trim, and add transitions and special effects.
The clips you've imported do not become part of the video program until you place them into the Timeline, so let's place it.
To place a clip into the Timeline:
- Choose a clip from the Project Window.
- Use the mouse to drag it to one track on the Timeline, drop your clip in the track.
- Drag the other clips to Video 1 track, positioning them in the right order, one against the other. See that each corresponding audio is placed in the Audio 1track.
This is a rough cut, giving you some idea of how your sequence works and what needs to be trimmed, edited, and modified. To see how your work is progressing, click the Play button underneath the Program view (or press the spacebar). Note that the edit line in the Timeline moves with the preview. This edit line indicates the active frame (the frame being edited or previewed).
Making a rough cut is not an obligation, you can make it directly more precise using the monitor screen.
Double-click on the clip in the Project Window, and it will open in the Source view (you can also drag it to the Source view), ready to be edited.
Double-clicking on a clip on the timeline make it appear on the Source view monitor.
Editing the sequence:
You'll need to remove the parts that you don't need: you'll need to trim your clips. Trimming a clip involves setting a new In point, Out point, or both. An In point is the frame at which a clip begins; an Out point is the last frame of the clip.
Adding In and Oup points in the Source view:
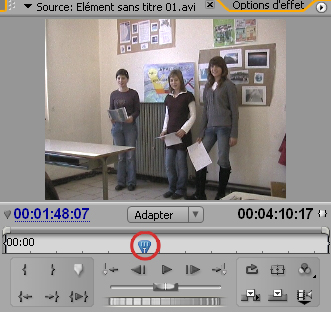
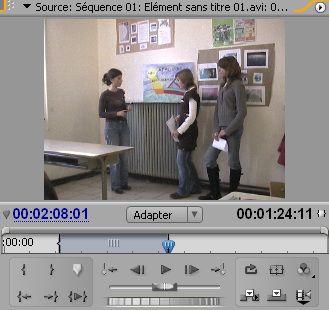
- Put the clip you want to edit in the Source view Monitor, direcly from the Project Window, or by double-clicking the clip in the timeline if you have already place it.
- You can set in and out points for your clips in the Monitor by clicking on these buttons:

- The controls for both views of the Monitor window also contain a shuttle slider, which lets you scrub clips. Scrubbing (advancing or reversing a clip manually) lets you precisely identify and mark events.

- Under the Source view, drag the shuttle slider when you want your clip to begin and click the In point button. Drag the shuttle slider when the clip must end and click the Out button.

- If you've marked a wrong point just make a new one, the new one will erase the old one.
- Drag the clip in the timeline if it wasn't already placed.
- If the clip was already in the timeline, depending of your version of Premiere the trim applys automatically in the timeline. Otherwise, click on the 'Apply' button.
It’s important to understand that the trimmed area has not been deleted! Premiere has hidden the trimmed frames so that they don’t appear in the Timeline and will not appear when you preview or export the video program.
You can easily restore them by resetting the In or Out points using any trimming method.
Another way to Trim your clip: in the Timeline window.
One option is to trim the edges of the clip in your timeline until it is the length you want it to be.
- Select the selection tool

- Identify the place you want to cut with the shuttle slider from the timeline (or from the Program monitor).
- To get your cursor to a more precise moment, use the slider-bar underneath the timelineor the one above to adjust by frame.


- Move your mouse to the edge of the clip in the timeline. As your mouse passes over the edge, it will turn into a resize icon

- To trim the end of the clip, just click-and-drag your clip until it is the length you want it to be.
- You can also trim the begining of clips: the resize icon will be
 .
. - You can use this option with either end or begining of clip. If you have too much shorten, you can extend it with the same tool. (But you will not be able to use the trim option to extend your clip past its original capture length.)
Because you've shorten your clip, there is now a gap in the Timeline between this clip and the
following ones:

To preserve a continuous flow, you need to close this gap by moving the other clips to the left. To do this, you’ll use the track selection tool.
![]()
This tool selects all the clips in a track to the right of where you click. Just drag the clip to the left.
Cut your clip
To cut your clip, you will need to use the Razor tool
![]()
located in the tool section of the Timeline
- Get your clip to the point you want to cut. To do this, play from the timeline (use the spacebar to start and stop). To get your cursor to a more precise moment, use the slider-bar in the target screen to adjust by frame.
- When you have your clip where you want it, select the Razor tool and click on the cursor line. Your clip will split and a new icon will appear in the clip to the right. This tells you that the clips are now two different clips.
- Finally, choose the select tool (an arrow, top row, left corner) and select the portion of your original clip you don't want. Press "Delete" and you are done. Note: if you are using both video and sound, be sure to delete the sound portion of your clip too.

